Plasma treatment for fabrication of PDMS device
The quartz chamber AutoGlow system is used to plasma treat the wafer substrate and the PDMS device.
This protocol details the fabrication of a 2 layer PDMS device, consisting of a valve layer (top) and channel layer (below). It is assumed that masters for respective layers have already been fabricated (see Godin:Protocols/SU-8 Master, Godin:Protocols/AZ Master). The idea is to modify the silicone elastomer base to curing agent ratio, thereby modifying PDMS elasticity.
From the Godin Lab, University of Ottawa, Canada:
To assure a strong bond between PDMS layers, oxygen plasma treatment is necessary. This surface treatment is known to have a very short duration, that is to say that both surfaces must quickly be brought into contact after exposure. For this reason, it is best to place the wafer and PDMS in the plasma bonder before each bonding step. Though ethanol has been known to extend the effects, it caused a partial collapse in the valve area of the main channels, and as such is not recommended. A higher power setting does not create a stronger bond. A 30 seconds 30 watt exposure works well.
Please refer to this link:
http://openwetware.org/wiki/Godin:Protocols/Multilayer_PDMS_-_Oct_26th
- Bonding to Glass
Clean a glass slide using deionised water, ethanol and isopropanol. Dry with nitrogen. Place glass slides and devices in the oxygen plasma. After treatment, press them gently together, making sure that the entire device is softly pressed down.
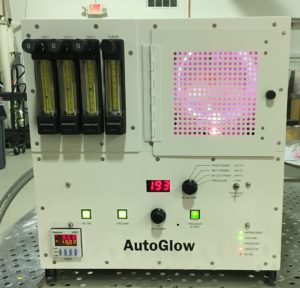
quartz chamber AutoGlow plasma system for PDMS plasma treatment
Click HERE for more information on the AutoGlow plasma system
Click HERE to see a video on the AutoGlow plasma system
Description
This protocol details the fabrication of a 2 layer PDMS device, consisting of a valve layer (top) and channel layer (below). It is assumed that masters for respective layers have already been fabricated (see Godin:Protocols/SU-8 Master, Godin:Protocols/AZ Master). The idea is to modify the silicone elastomer base to curing agent ratio, thereby modifying PDMS elasticity.
Valve Layer
- Mix PDMS 7:1
For most devices, 80g of PDMS is sufficient to produce reasonably-sized devices. Weigh 70g of silicone elastomer base on the scale using the weighing dish, then add 10g of curing agent. Make sure to maintain the 7:1 ratio; if too much is added, add more base as required. Use a pipette tip to mix the solution for 10 min under the fume hood. Blow dry the valve master with nitrogen, and place in a polystyrene dish. Use Scotch tape to fix the wafer at the center of the dish by taping all sides. We want to prevent the wafer from floating up, or PDMS from getting under the wafer once it’s poured in.
- Aminosilane surface treatment
Place the dish in the vacuum chamber, along a 1μL drop of trichlorosilane a petri dish. Vacuum for 5 min, then wait 1 hour for it to coat the master. Full name: (tridecafluoro-1,1,2,2-tetrahydrooctyl)trichlorosilane
- 30 min degass
Fill the dish with PDMS. Place the dish in the vacuum chamber, and allow it to degass for 30 minutes, or until it stops bubbling. To prevent overflow, you may have to periodically break vacuum and allow some bubbles to escape.
- 24 min @ 80°C
The dish is now placed in the oven for 24 min at 80°C. The idea is to partially cure the PDMS, so it’s solid but still somewhat sticky. Let the PDMS cool for about an hour afterwards; this will facilitate the next step.
- Cut out devices
Cut out each device from the wafer. Be careful to avoid cutting near master features, as it will be reused for future devices. Valve holes are punched using the 0.75 mm diameter tool.
- Cleaning
Rinse devices thoroughly with distilled water, making sure the water goes through the valve hole. Next, sonicate for 5 min in each of these solutions: soapy water, deionised water, ethanol and isopropanol. Dry with nitrogen, store in a closed clean dish.
Fluidic Layer
- Mix PDMS 20:1
Prepare the PDMS as before, but with 10 g of base and 0.5 g of curing agent.
- 30 min degass
Place the weighing dish in the vacuum chamber, degassing for 30 min.
- Spin coat
Enter the clean room, cover the top of the spin coater in aluminum foil to facilitate future cleaning. Place the wafer on the spin coater using the wafer alignment tool, being very careful not to add bubbles. Set the program to D, or so as to have the following:
2 min @ 3000 RPM, ACL = 010 (15 microns)
- 20 min @ 80°C
Place the wafer in a covered dish, exit clean room and place the wafer in the over for 20 min at 80°C.
Device Fabrication
- Alignment and Oxygen Plasma
Enter the clean room with both the valve layer devices and channels. Use the mask aligner to carefully align the channels to the valves. Place the wafer and turn on vacuum in soft contact mode. Place a blank clean slide on the slide holder accessory, and vacuum it in place. Place your first device channels facing down beneath the glass slide. It should still be sticky enough to stay in place. Close the aligner lid, and adjust the channel position to correspond to the valve. You may do so first by eye, then by using the microscope. When all is in place, turn the elevation knob to lift the channels into the valves. This may require multiple XY adjustments to get it just right. When there is contact, turn the knob a bit further so as to make contact over the viewing area. Next, remove the sample vacuum to release the slide, and lift the lid. The slide should stay in place during plate lift. Peel off the glass slide, and put it back in position with vacuum. Continue as such until all valve PDMS pieces are positioned on the wafer. Be careful to lower the Z stage between devices, so as to not damage anything. Also note that the lid lifts in an arc, so move your wafer out of the way as necessary to prevent contact between PDMS devices.
To assure a strong bond between PDMS layers, oxygen plasma treatment is necessary. This can be done using the Godin:Protocols/Glow Research Auto Glow. This surface treatment is known to have a very short duration, that is to say that both surfaces must quickly be brought into contact after exposure. For this reason, it is best to place the wafer and PDMS in the plasma bonder before each bonding step. Though ethanol has been known to extend the effects, it caused a partial collapse in the valve area of the main channels, and as such is not recommended. A higher power setting does not create a stronger bond. A 30s 30W exposure works well.
- >2 hrs @ 80°C
Place your wafer in the oven for at least 2 hrs at 80°C. If possible, leave it overnight.
- Punch fluidic holes
Use the 0.75 mm hole punch to make a hole at the valve inlets and fluidic inlets for each PDMS device. The stereo-microscope is great for finding your features. Keep the light arms at a low incidence angle with respect to the PDMS surface so the features stand out. Place your PDMS piece on a junk piece of PDMS so you can easily go through without damaging the punch, and keeping holes consistent. The PDMS should be fairly sticky, so do your best to make it smooth. Try to keep holes vertical.
- Cleaning
Follow the same cleaning procedure as before. After thorough rinsing in distilled water, sonicate for 5 min in each of these solutions: soapy water, deionised water, ethanol and isopropanol. Dry with nitrogen, store in a closed clean dish.
- Bonding to Glass
Clean a glass slide using deionised water, ethanol and isopropanol. Dry with nitrogen. Place glass slides and devices in the oxygen plasma. After treatment, press them gently together, making sure that the entire device is softly pressed down.
- 1 hr @ 80°C
Place your bonded devices in the oven for 1 hour.
- Additional PDMS leak-proofing
An additional step that has helped prevent leaks between the glass and PDMS is the addition of a PDMS seal at the perimeter of the PDMS block. You prepare a 11g mixture of 10:1 PDMS as before, but without the degassing step. Pour the PDMS in a syringe with a large needle. Remove devices from the oven and carefully squeeze the PDMS out along the perimeter of each PDMS device.
- 2 hr @ 80°C
Place the devices in the oven for at least 2 hours, preferably leaving them to fully cure overnight.
Reusing Masters
To use your channel master again, you’ll have to clean out the sticky PDMS layer left in place. To do so, simply prepare a 10:1 PDMS mixture as before, with 20g base, 2g curing agent. Use Scotch tape to stick the wafer on the bottom of a dish, and pour the PDMS. Degassing is not necessary since we’re using this PDMS as a means to remove the underlying layer of PDMS. Place in oven for 1 hr at 80°C, then peel off carefully avoiding any stress to the wafer. After a few uses, you should repeat the aminosilane surface treatment.
